I had been planning to do this for a long time now. I finally had a couple days off work so I figured it would be a great opportunity to do it. I just don't know which I hate more ... working in single digit winters or in 90 degree 100% humid days. I have had this Odyssey PC1200 battery sitting in my garage for a while. It used to be the main battery on my blazer but I upgraded that to a PC1500 so I had this one left over as a perfect candidate for the backup in the Jeep.
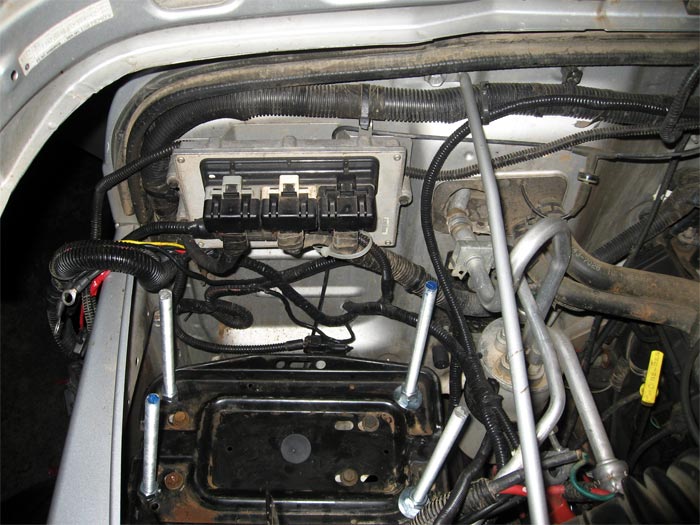
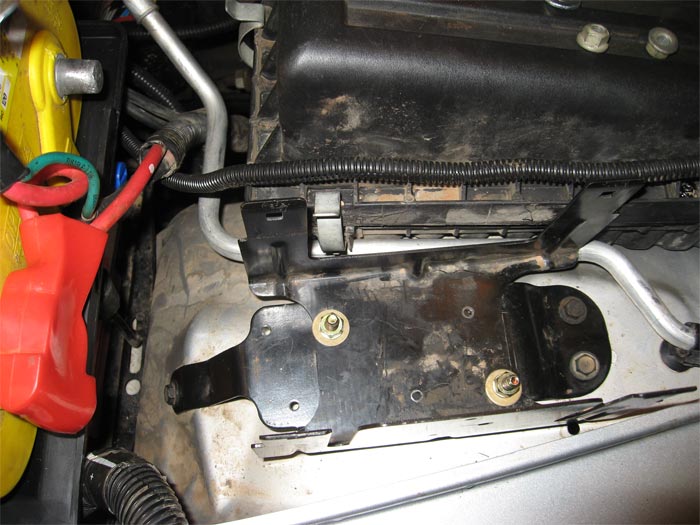
To install the second battery, I started off by removing the main battery. I then cut a 36" long 1/2" threaded bolt (available at Home Depot) into four 9" segments and bolted them in each of the four corners of the stock battery tray. Most of this step was done by eye-balling for the clearances in the engine bay as well as for the nuts under the battery tray. One of the reasons the Odyssey is below is because it has a metal jacket and is flat so it is much better suited to support some of the weight of the battery tray.
The next step was to test fit the Odyssey PC1200 battery ...
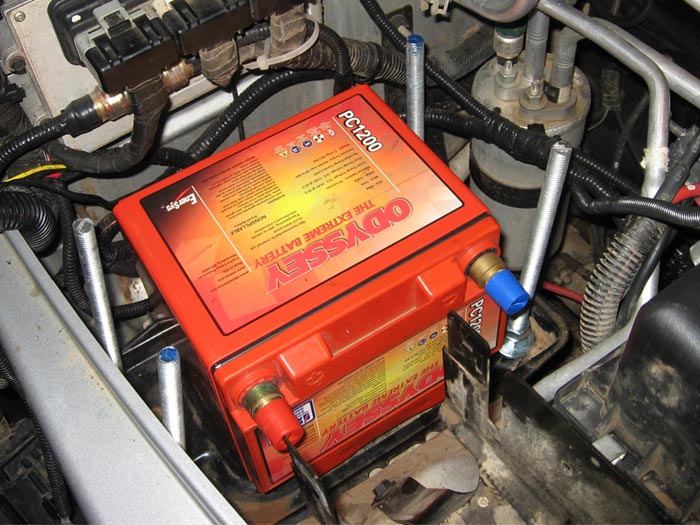
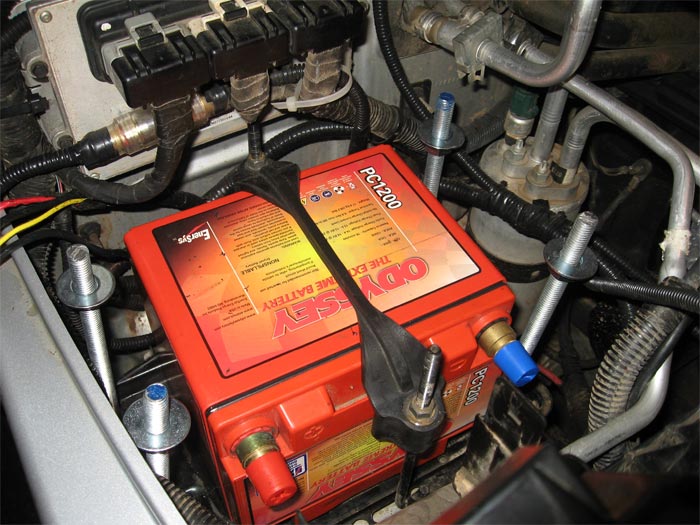
Next, I strapped down the secondary battery with a battery strap and the stock tie-down bolts. The strap fits prefectly in the groove of the new battery tray which will go over it. Four more bolts and washers on each stud will support the new battery tray.
Of course the next step was to install the new battery tray. Since it is made of plastic, positioning and drilling the holes were trivial. I secured the new tray using the 5 bolts (the 4 studs and one of the original tie-down bolts).
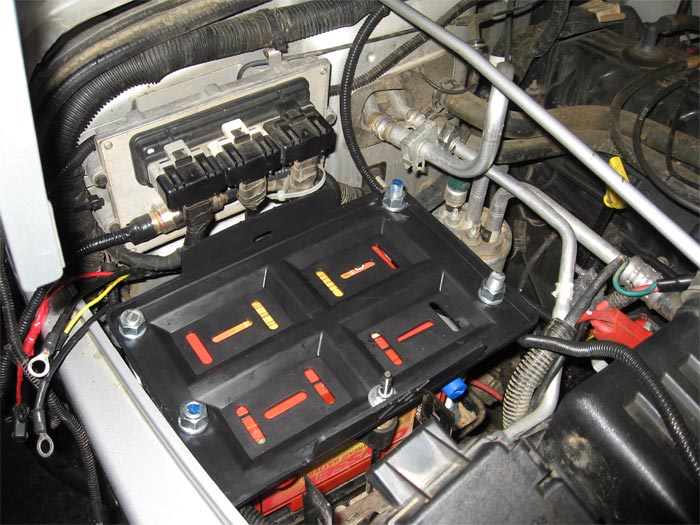
In order to make room for the battery connectors, I had to move back the fuse box by about an inch. I did this by drilling out the rivets and drilling a couple of new holes for the new bolts. Now there is plenty of room for all the connectors and attachments.
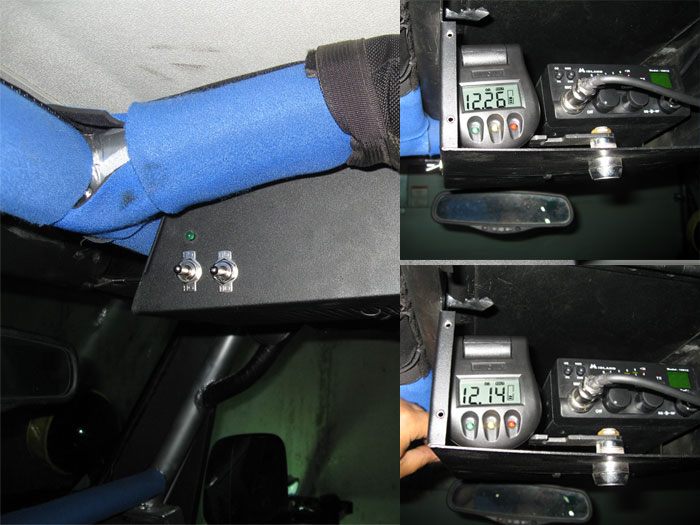
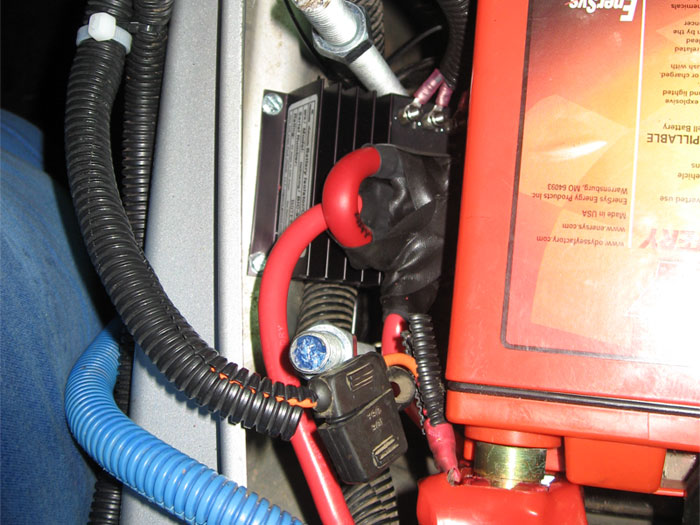
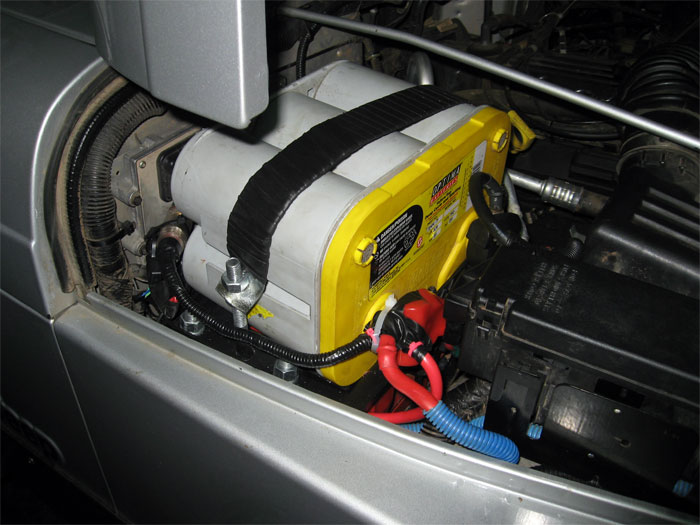
The final step was to place the Optima Yellow Top main battery on the new tray, tie things down and reconnect all the wires. Of course the isolator and all the wiring has to be done as well. Below are some shots of the finished top battery strap as well as the installed isolator, inside switches, and voltage monitor.
The Hellroaring isolator/combiner installed on the fender next to the backup battery (will be under the top battery tray):
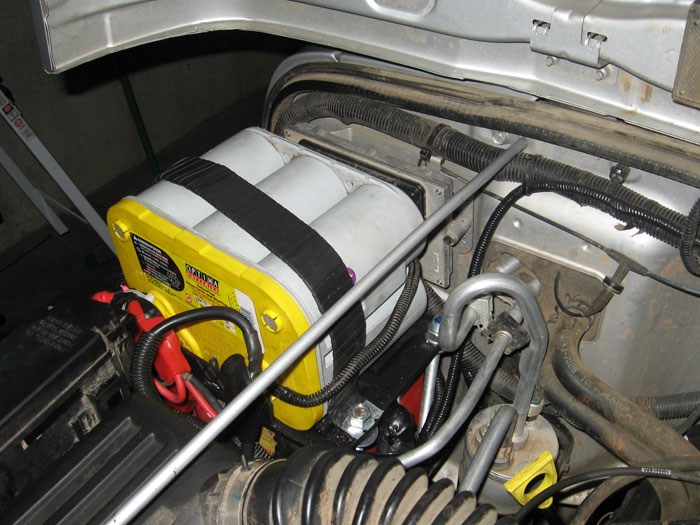
A couple shots of the finished install with the metal strap I used for the top battery. That battery is not going anywhere! The strap is bolted to one of the main support bolts on the driver side and tightened down with a new bolt on the passenger side. The hood clearances were tight but still "plenty" of room.
... and a look at the switches I have installed for now inside. The switch on the left is on-off-on used to combine the batteries, leave them in auto mode (charge the backup but don't let it drain), and completely isolate the backup. The LED lights up when the system is charging. The switch on the right is also an on-off-on switch used to select which battery powers an AUX 12V socket that I have wired up in the overhead console. I am using a lighted 12V digital gauge in that socket so this switch can be used to check the voltage of each battery or to run small accessories as needed (typically it'll be in the off position).